
Living in close proximity, like in a duplex or townhome, often means sharing more than just a property line – you might also be sharing your sounds. That’s where a party wall, the shared wall between two dwelling units, comes in. Over time, you might notice that sounds travel a little too easily through it. Fortunately, there are practical DIY solutions to help soundproof your party wall and reclaim some peace and quiet in your home.
Common Noise Transmissions
When you hear your neighbors, it’s typically through a few primary ways: airborne sound (like voices, music, or television) and impact sound (like footsteps or doors closing). Most standard party walls, especially older ones, aren’t built with soundproofing as a primary concern. They might consist of a single layer of drywall on each side of wooden studs, offering minimal resistance to sound waves.
DIY Soundproofing Layers: What Works?
Adding layers to your existing wall is the most effective DIY approach to soundproofing. The goal is to add mass and create decoupling, which disrupts how sound travels.
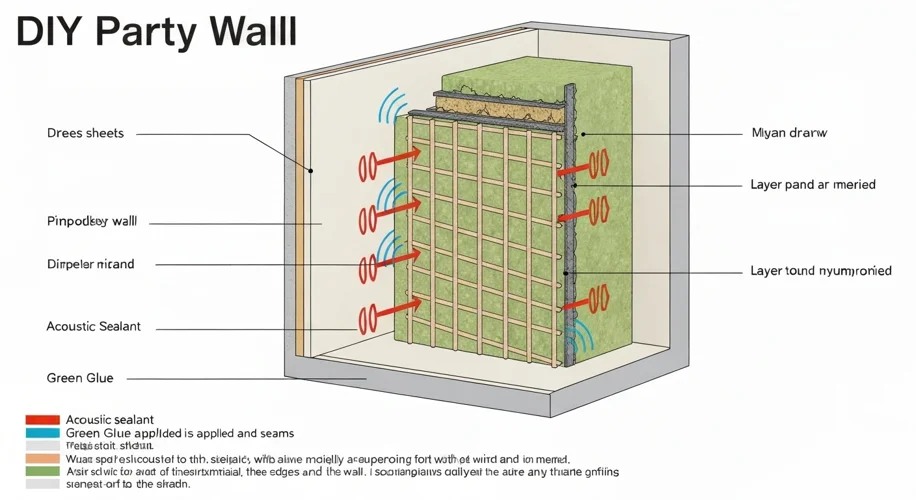
- Adding Another Layer of Drywall: This is a fundamental step. Installing a second layer of 5/8-inch Type X drywall directly over your existing drywall adds significant mass to the wall. More mass means more resistance for sound to travel through.
-
Green Glue Noiseproofing Compound: This is where things get interesting. Green Glue is a viscoelastic compound that you apply between the two layers of drywall. As sound waves hit the wall, the Green Glue converts the acoustic energy into tiny amounts of heat, effectively damping the sound. It’s a relatively simple addition that significantly boosts soundproofing performance.
-
Acoustic Sealant: Don’t underestimate the power of sealing small gaps. Sound can easily escape or enter through tiny cracks around electrical outlets, light switches, or the perimeter of the wall where it meets the ceiling and floor. Acoustic sealant is a non-hardening caulk that remains flexible, which is crucial for soundproofing. Use it liberally to seal all potential air gaps.
How to Put It All Together (The DIY Process):
- Preparation: Start by removing any trim or fixtures on the wall. Ensure your existing wall is clean.
- Seal the Gaps: Use acoustic sealant to fill any visible cracks or holes. Pay attention to where the wall meets the floor, ceiling, and any adjacent walls. Seal around any electrical boxes too.
- Apply Green Glue and New Drywall: If you’re adding a second layer of drywall, apply Green Glue to the back of the new drywall sheet according to the manufacturer’s instructions. Then, press the new drywall firmly into place over the existing drywall. Screw the new layer into the studs, ensuring it’s secure.
- Finishing: Once the Green Glue has set (usually within 24 hours, though you can tape and mud immediately), you can tape, mud, sand, and paint your new wall. Seal any new gaps that may have appeared during the process.
What About Insulation?
While adding insulation like fiberglass or mineral wool inside the wall cavity is often recommended for soundproofing, it’s a more involved DIY project that typically requires opening up the wall. For a simpler, surface-applied solution, the drywall and Green Glue combination is a very effective starting point. If you’re doing a major renovation or building a new wall, filling the cavity with insulation is definitely worth considering.
By adding mass with an extra layer of drywall and using a damping compound like Green Glue, along with thorough sealing with acoustic sealant, you can significantly reduce noise transmission. It’s a rewarding DIY project that can make a big difference in creating a more peaceful shared living space.