
Sometimes, life gets busy, and our green friends suffer. I’m Elias, and I’ll be honest – one of my plants was looking pretty rough. It was droopy, the leaves were yellowing, and frankly, it seemed like it was on its last leg. It’s easy to want to toss a struggling plant, but I decided to see if I could bring it back from the brink. And you know what? It worked!
I want to share my experience, not as a plant guru, but as someone who learned a few things along the way. Maybe it will inspire you not to give up on your own sad-looking leafy companions.
The “Before” Picture
My plant, a forgiving sort, had been neglected for a while. It was stuck in the same pot, likely for years, and the soil looked dry and compacted. The leaves were pale, some even falling off if I looked at them too hard. It wasn’t getting enough light, and watering was inconsistent, to say the least.
The Rescue Mission: Step-by-Step
- Assessment and Gentle Cleaning: First, I took a close look. I gently removed any completely dead leaves or stems. I also wiped down the remaining leaves with a damp cloth to remove dust, which helps the plant breathe and absorb light better.
-
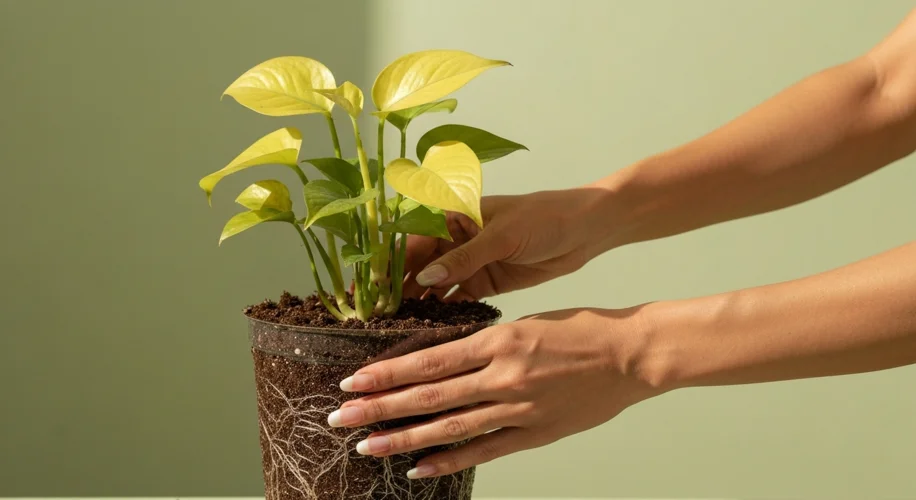
The Repotting: This was the main event. I chose a pot that was just slightly larger than the old one. Too big a pot can lead to waterlogged soil, which is a death sentence for many plants. I used a good quality potting mix, amended with some perlite for drainage. Gently, I eased the plant out of its old pot. I teased away some of the old, compacted soil from the roots, being careful not to damage them too much. Then, I placed it in the new pot, filling in with fresh soil around the root ball until it was secure.
-
The First Watering (Post-Repot): After repotting, I gave it a good, thorough watering. I let the water drain freely from the bottom of the pot. This helps settle the new soil around the roots.
-
Finding the Right Spot: I moved the plant to a spot where it would get bright, indirect sunlight. Too much direct sun can scorch weakened leaves, while too little light won’t help it recover. It took a little trial and error to find the sweet spot.
-
Establishing a New Routine: This is crucial. I committed to a regular watering schedule, checking the soil moisture with my finger. I water when the top inch or two of soil feels dry. I also started misting its leaves occasionally, especially if the air in my home tends to be dry. A little diluted, balanced liquid fertilizer, once it started showing signs of new growth, also gave it a boost.
What I Learned
- Patience is Key: This didn’t happen overnight. It took weeks of consistent care for me to see significant improvement. New leaves started to unfurl, and the existing ones perked up.
- Repotting is a Lifesaver: Plants outgrow their pots, and compacted soil hinders growth and aeration. Repotting provides fresh nutrients and space for roots to grow.
- Light Matters: Understanding your plant’s light needs is fundamental. What looks good to us might be too harsh or too dim for the plant.
- Don’t Fear the Process: It felt a bit daunting at first, but breaking it down into simple steps made it manageable. Even if you’re not a seasoned gardener, you can do this.
Seeing my plant recover and thrive again is incredibly rewarding. It’s a reminder that with a little attention and the right care, even a nearly-lost plant can be brought back to life. So, next time you see a plant looking a bit sad, don’t give up on it. Give it a chance – you might be surprised at what it can do!