
This year, I decided to dive headfirst into processing my cayenne peppers, and let me tell you, it was an experience! I learned a few things along the way, chief among them being the absolute necessity of good ventilation. My kitchen turned into a tear-jerking, lung-burning zone until I opened every window and turned on every fan. Lesson learned!
But beyond the initial sting, the reward was well worth the effort. Making your own red pepper flakes from scratch is surprisingly straightforward and incredibly satisfying, especially when you’ve grown the chilies yourself. It’s a fantastic way to capture the essence of your garden’s heat and add a personalized touch to your cooking.
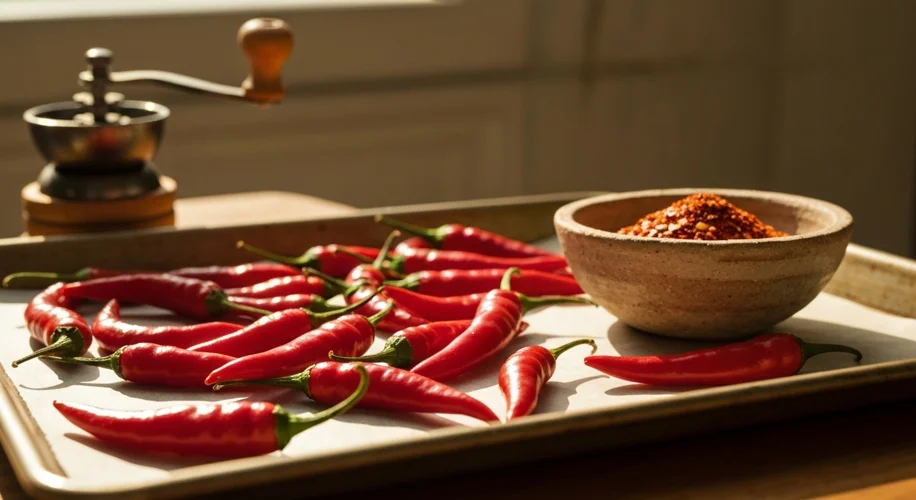
What You’ll Need:
- Fresh cayenne peppers from your garden (or store-bought if you didn’t grow them)
- Baking sheets
- An oven or a dehydrator
- A spice grinder or mortar and pestle
- Airtight jars or containers for storage
Step 1: Harvesting and Drying
Once your cayenne peppers are fully red and ripe, it’s time to harvest them. Gently twist them off the plant. If you plan to dry them whole, you can tie them in small bundles and hang them in a warm, dry, well-ventilated spot. However, for making flakes, drying them flat is usually more efficient.
Spread the peppers in a single layer on baking sheets. You can either air dry them if your climate is suitable (warm and dry), or use your oven or a dehydrator.
- Oven Method: Set your oven to its lowest temperature setting (usually around 150-170°F or 65-75°C). Leave the oven door slightly ajar to allow moisture to escape. This process can take several hours, depending on the size and moisture content of the peppers. You want them to be completely dry and brittle – they should snap rather than bend.
- Dehydrator Method: Follow your dehydrator’s instructions for drying peppers or chilies. This typically involves setting the temperature low and allowing ample time for the peppers to dry completely.
Step 2: Grinding Your Flakes
Once the peppers are thoroughly dried and brittle, it’s time to turn them into flakes. This is where the spice grinder or mortar and pestle comes in.
- Spice Grinder: Carefully place the dried chilies into your spice grinder. Pulse a few times, checking the consistency after each pulse. You want coarse flakes, not a fine powder. Be prepared for some ‘dust’ to escape, even with a good grinder, so keeping ventilation in mind is still wise!
- Mortar and Pestle: This method gives you more control over the coarseness. Place a handful of dried chilies in the mortar and gently grind with the pestle. Work in batches to achieve your desired flake size.
Step 3: Storing Your Homemade Flakes
Transfer your freshly made red pepper flakes into clean, airtight jars or containers. Store them in a cool, dark place. Properly stored, homemade pepper flakes can retain their flavor and heat for many months.
There’s a special kind of satisfaction that comes from using an ingredient you’ve grown and processed yourself. These DIY red pepper flakes will add a vibrant kick and a touch of your own garden’s magic to everything from pizzas and pastas to stir-fries and sauces. Give it a try – you might just find your new favorite kitchen project!