
Summer scorching my attic and winter chills creeping in? If you’ve got a cathedral ceiling, especially in a converted attic space, you know the struggle. These high ceilings can be beautiful, but they often come with a side of extreme temperatures and high energy bills. Let’s talk about how we can tackle this ourselves.
Cathedral ceilings mean a larger air volume and often less accessible or awkwardly shaped spaces for insulation. This can make them prime culprits for energy loss. When your attic conversion makes that space feel more like a sauna in July or an icebox in January, it’s time to look at insulation.
While professional blown-in insulation or spray foam are often the gold standard, they can be pricey and sometimes require specialized contractors. For those of us who like to get our hands dirty, there are some effective DIY-friendly solutions to consider, particularly rigid foam panels.
Why Rigid Foam Panels?
Rigid foam insulation, like expanded polystyrene (EPS) or polyisocyanurate (polyiso), comes in rigid boards. They offer a good R-value (a measure of thermal resistance) for their thickness and can be cut to fit snugly into the irregular spaces common in cathedral ceilings. Think of them as custom-fit blankets for your attic rafters.
How to Approach It (The DIY Way):
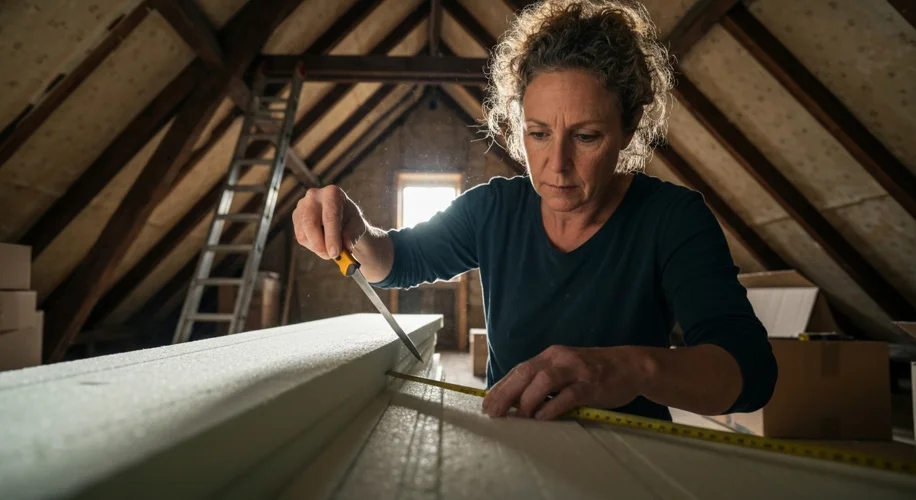
- Assess Your Space: First, figure out what you’re working with. Are there existing vents, wiring, or plumbing you need to work around? Understanding your attic’s layout is key.
-
Choose Your Foam: Polyiso generally offers a higher R-value per inch compared to EPS, making it a good choice if space is tight. EPS is often more budget-friendly.
-
Measure and Cut: Carefully measure the spaces between your rafters. Precision here makes a big difference in creating a tight seal. You’ll want to cut the foam panels to fit snugly.
-
Install: Place the cut foam panels into the cavities between the rafters. For a really good seal, you might use a foam sealant or expanding foam in the small gaps around the edges of the panels. This helps prevent air leaks, which is crucial for effective insulation.
-
Vapor Barrier: Depending on your climate and local building codes, you might need to install a vapor barrier on the warm side of the insulation. This prevents moisture from migrating into the wall cavity and causing problems.
What to Keep in Mind:
- Ventilation: Don’t forget about attic ventilation! If your attic is designed to have a